How to Prepare Your Car for Transport: Complete Checklist
How to Prepare Your Car for Transport
Proper preparation takes about 30 minutes and prevents the vast majority of issues that arise during auto transport. Skip these steps, and you risk damage disputes, delayed pickups, and unnecessary stress.
This checklist covers everything you need to do before the carrier arrives.
The Complete Pre-Transport Checklist
Step 1: Wash Your Vehicle
Start with a thorough exterior wash. This is not about aesthetics—it is about documentation. A clean car makes every existing scratch, dent, and chip visible. Dirt hides damage, and hidden damage creates disputes at delivery.
Pay special attention to:
- Wheel wells and lower panels where road grime accumulates
- Bumpers and corners where minor scuffs hide under dust
- The roof, which often has blemishes people never notice
Why This Matters
If your car arrives with a scratch you did not notice because dirt was covering it at pickup, you cannot prove it happened during transport. A clean car protects you.
Step 2: Document Existing Condition
After washing, photograph everything. This is your single most important protection against damage disputes.
What to photograph:
- All four sides of the vehicle from a few feet back
- Each corner at a 45-degree angle
- Close-ups of any existing damage (scratches, dents, chips, rust)
- The roof (stand on something if needed)
- Wheels and tires
- The odometer reading
- The dashboard and interior condition
How to do it right:
- Use your phone's highest resolution setting
- Ensure timestamps are enabled in your camera settings
- Take photos in good lighting—overcast daylight works best
- Capture at least 20–30 photos total
Pro Tip
Record a slow video walk-around of the entire vehicle. A 60-second video captures everything and provides irrefutable documentation with a built-in timestamp.
Step 3: Remove All Personal Items
Carrier insurance does not cover personal belongings inside your vehicle. Period. If something is stolen or damaged during transport, the carrier has no liability for items that were not supposed to be there.
Remove these items:
- Sunglasses, phone chargers, and electronics
- Garage door openers and parking passes
- CDs, books, and loose items in the cabin
- Everything from the trunk and cargo area
- Documents and paperwork
- Toll transponders (they keep charging during transit)
- Dashcams and aftermarket phone mounts
Also remove these from the exterior:
- Bike racks and cargo carriers
- Removable spoilers and antenna toppers
- Aftermarket tow mirrors
- Loose license plate frames
Carriers are not responsible for damage to aftermarket accessories. Remove anything that could come loose, shift during transit, or be stolen.
Step 4: Check Fluids and Mechanical Condition
Your vehicle needs to be in operable condition for standard transport. Carriers drive your car onto and off the trailer, which requires basic functionality.
Fluid check:
- Ensure no active fluid leaks (oil, coolant, transmission fluid, brake fluid)
- If your car leaks, inform the carrier in advance—they may need to place it in a specific position
- Top off essential fluids if they are critically low
Mechanical check:
- Battery should hold a charge and start the car
- Brakes must work (the driver needs to control the vehicle during loading)
- Steering must function
- Tires should be properly inflated—not just for the drive onto the trailer, but to prevent flat spots during extended stationary transport
If Your Car Does Not Run
Non-running vehicles can still be shipped, but require special equipment and cost $100–$200 more. Inform the carrier before booking so they bring the right tools and quote accurately.
Step 5: Reduce Fuel Level
Keep your fuel tank at one-quarter full or less. There are two reasons:
- Weight reduction. A full tank of gas weighs 100–150 pounds. Less weight means easier loading and reduced strain on the trailer.
- Safety. Less fuel means reduced fire risk during transport. Carriers prefer minimal fuel for this reason.
You need enough gas for the driver to load and unload the vehicle—about a quarter tank handles this easily.
Step 6: Disable Your Alarm System
If your vehicle has an aftermarket alarm, disable it before pickup. Alarms that trigger during transport create problems:
- The battery drains while the car sits on the trailer
- Drivers cannot always access the vehicle quickly to silence it
- It annoys everyone at every truck stop along the route
Factory alarms connected to the key fob are usually fine since the driver will have the key. Aftermarket systems with motion sensors or tilt sensors should be deactivated.
Step 7: Secure or Remove Loose Parts
Walk around your vehicle and identify anything that could shift, rattle, or fall off during transport:
- Retractable antennas — Retract them or remove them
- Convertible tops — Secure in the closed position
- Truck bed covers — Lock or remove tonneau covers
- Mirror caps — If any are loose, tape or remove them
- Spoilers — Ensure bolts are tight; remove if they are aftermarket and loosely attached
- Running boards — Confirm they are secure
If something is already damaged or loose, it will get worse during 1,000+ miles of highway vibration. Fix it or remove it before pickup.
Step 8: Fold In Mirrors
If your vehicle has power-folding mirrors, fold them in. If manual, push them in as far as they go. This reduces the vehicle's width, making trailer positioning easier and reducing the chance of contact with adjacent vehicles.
What You CAN Leave in the Car
Despite the "remove everything" advice, a few items can stay:
- Floor mats — Factory or aftermarket, they are fine
- Spare tire and jack — Leave the factory equipment in place
- Child car seats — If properly secured, most carriers allow them
- Owner's manual and registration — Keep a copy of your registration in the glovebox
Some carriers allow up to 100 pounds of items in the trunk if they are packed flat and below the window line. However, this varies by carrier and these items are uninsured. Anything valuable should go with you, not your car.
What to Prepare for the Driver
When the carrier arrives, have these ready:
- Both sets of keys — The driver needs one set. Keep a spare for yourself if available.
- Written instructions — If your car has quirks (a sticky door, a specific way to start it, a finicky trunk latch), write them down.
- Your contact information — Phone number, email, and an alternate contact.
- Payment — Know the payment method and amount due. Have cash or a card ready if payment is due at pickup.
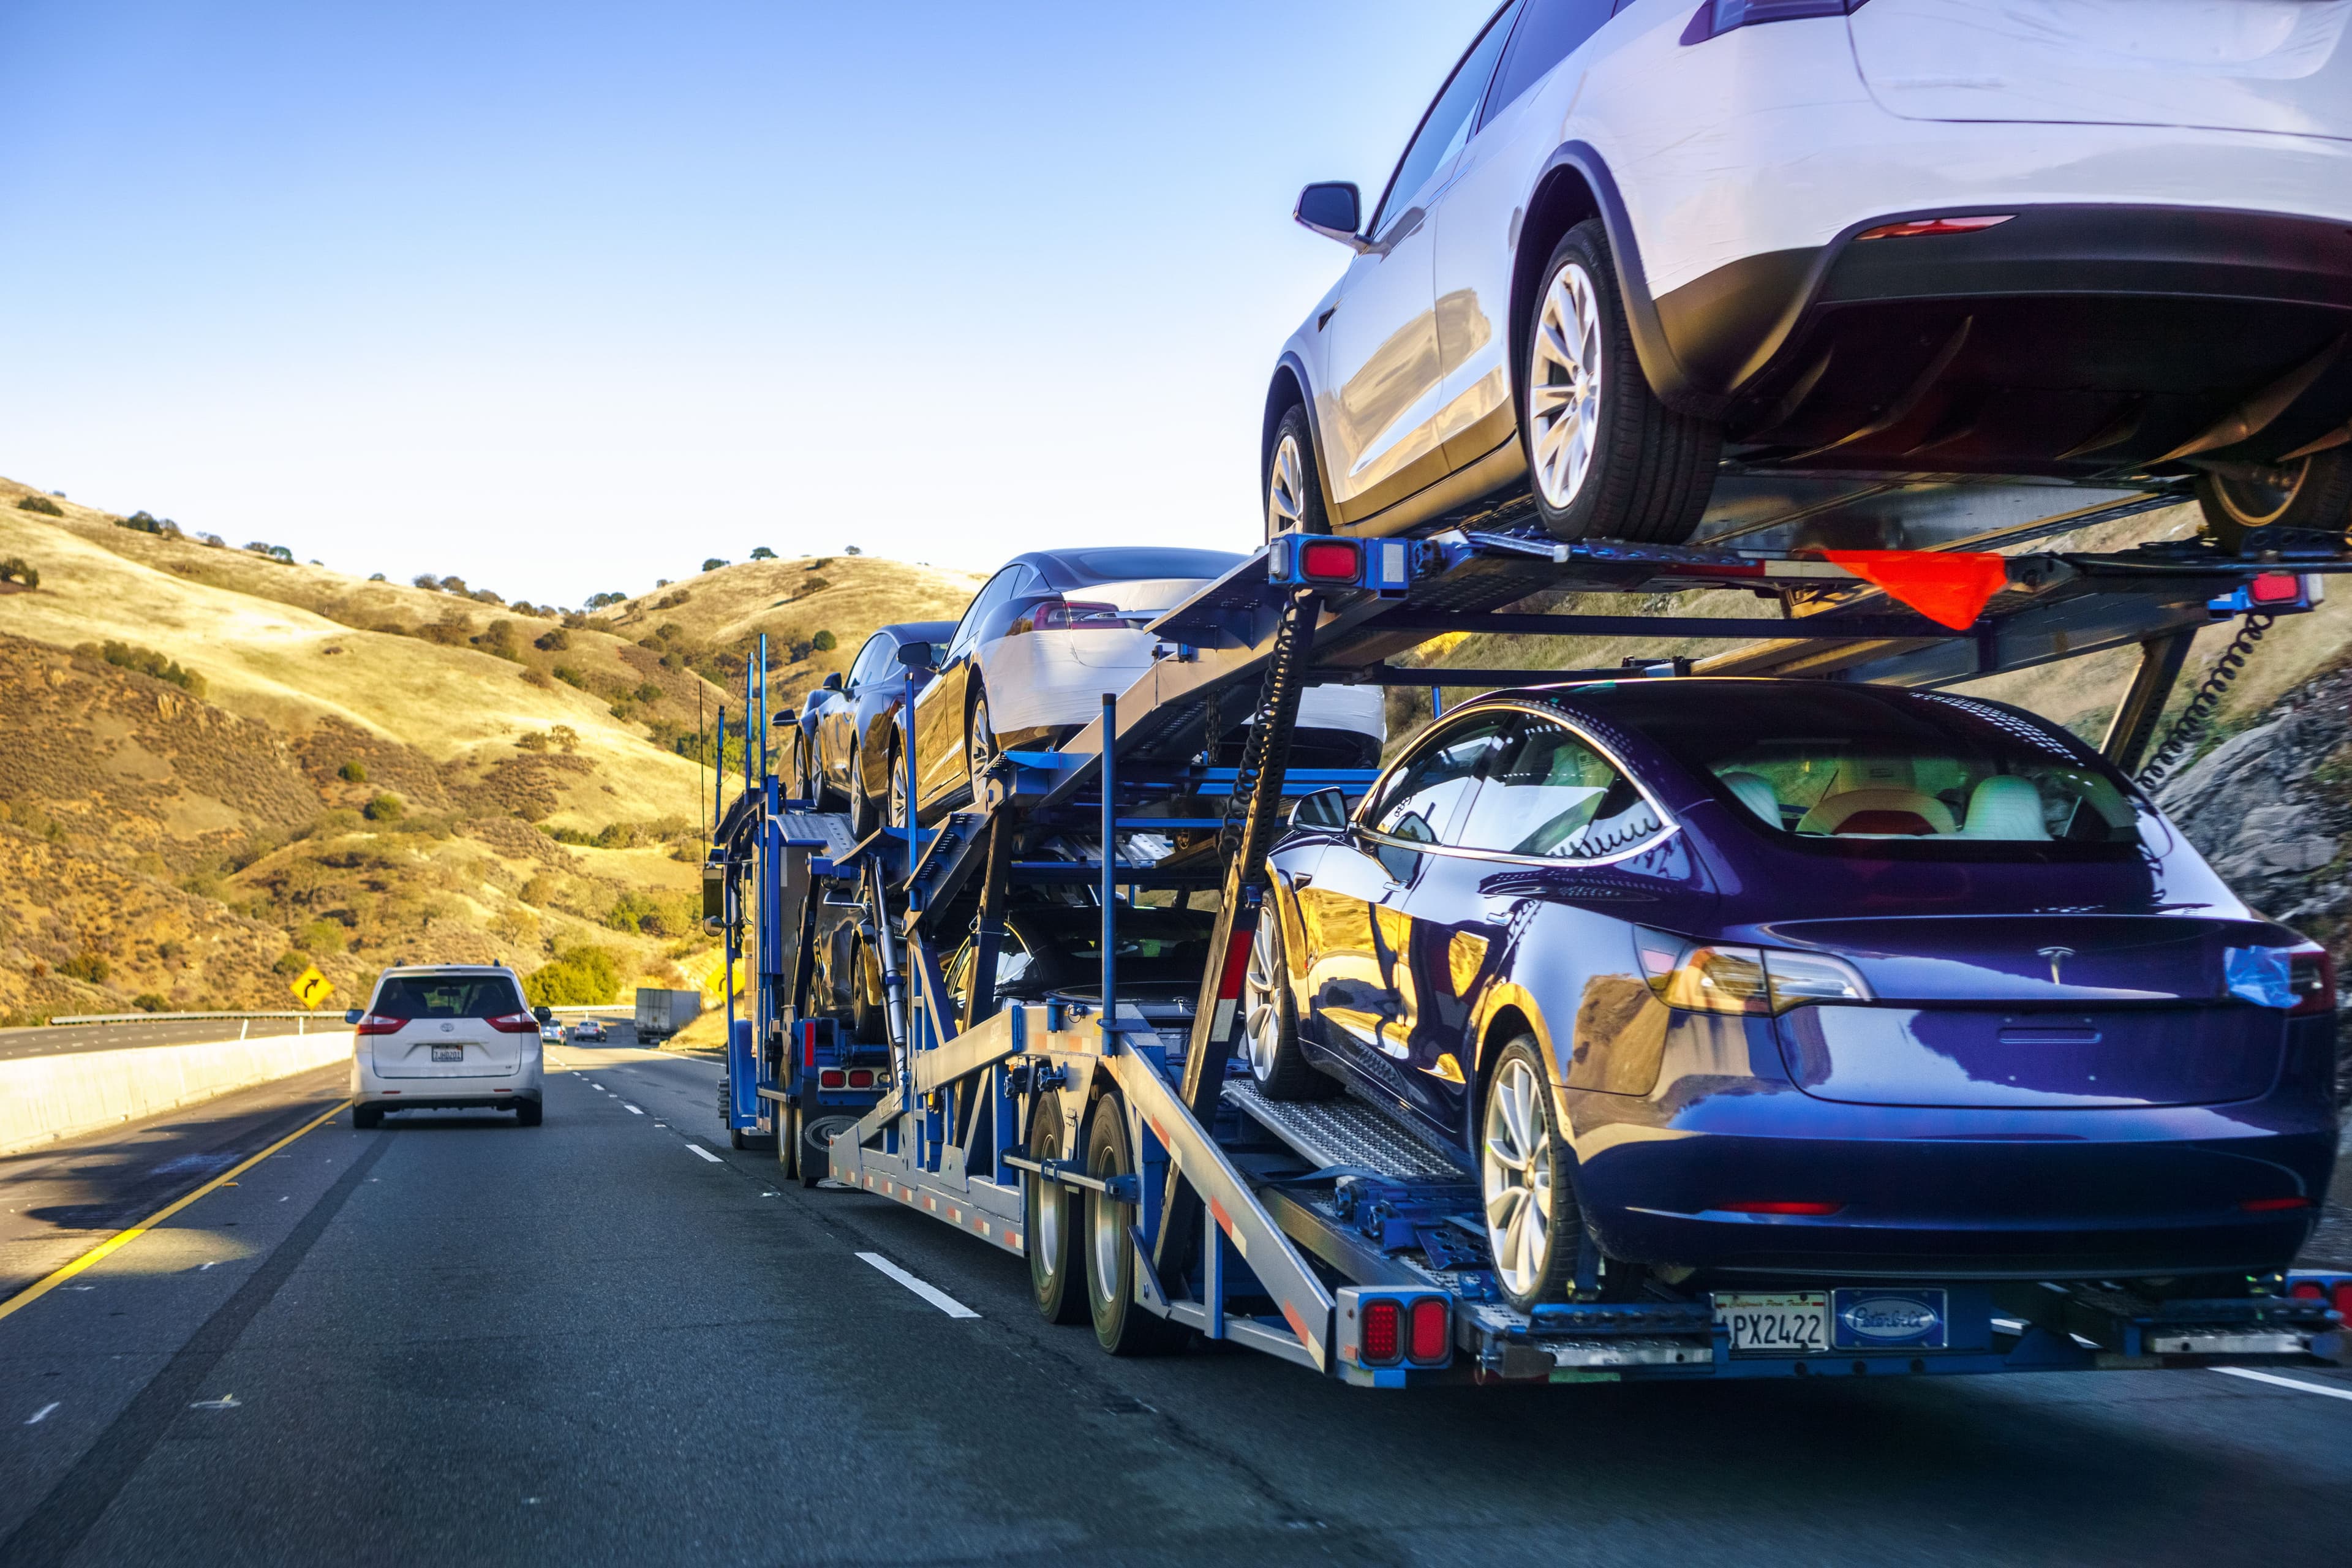
The Pickup Process
When the driver arrives, you will complete a joint inspection together. This is called the Bill of Lading (BOL) inspection.
What happens:
- The driver walks around the vehicle with a condition report form
- Every existing scratch, dent, chip, and imperfection is noted on the form
- You review the form and add anything the driver missed
- Both of you sign the document
Do not rush this. The Bill of Lading is your legal record of the car's condition at pickup. Anything not documented on this form becomes difficult to claim as transport damage later.
Critical Reminder
Review the Bill of Lading carefully before signing. If the driver marked something as "prior damage" that you believe was not there, speak up immediately. Once signed, this document governs damage disputes.
Common Preparation Mistakes
Avoid these frequent errors:
- Leaving a full tank of gas. Wastes money and adds unnecessary weight.
- Forgetting toll transponders. You will get charged for every toll along the carrier's route.
- Not disabling aftermarket alarms. Dead battery at delivery means a jump start and frustration.
- Skipping photos. Without documentation, damage claims become he-said-she-said disputes.
- Leaving personal items. If items go missing, you have no recourse. The carrier is not liable.
- Ignoring fluid leaks. A leaking vehicle can damage other cars on the trailer, creating liability issues for you.
After Pickup: What to Expect
Once your car is on the trailer:
- You will receive a copy of the Bill of Lading (keep it safe)
- The carrier or broker will provide tracking or update contact information
- Transit times vary by distance: 2–4 days regional, 7–14 days cross-country
- The driver or dispatch will contact you before delivery
When your car arrives, perform another thorough inspection comparing the vehicle's condition to your pre-shipment photos and the pickup Bill of Lading. Note any new damage on the delivery receipt before signing.
Ready to Ship?
Proper preparation makes the entire transport process smoother for everyone—you, the driver, and your vehicle.
Car Transport Connection provides:
- Pre-shipment guidance from our support team
- Licensed, insured carriers with verified credentials
- $150 Price Protection guarantee
- Real-time tracking from pickup to delivery
Have a specific vehicle with unique preparation needs? Contact our team for tailored advice before your shipment.